Sharing your new blog post on facebook and twitter may only take 30 seconds but having an automated system in place to do that will reduce one task from your already long list of things to do. This is for WordPress users (bloggers).
I’m writing this because I’ve spent hours or should I say “wasted” hours searching for a good plugin that will do this job. I found many posts but most of them were useless. Because –
- either they end up selling something by suggesting us to use a paid plugin
- or they are outdated posts because of which the plugins they suggest or recommend are either discontinued or they are not the best option right now considering many new plugins released.
This post is the result of my long research to find the best way to automatically post your articles to Social Network Sites like Facebook and Twitter.
Auto Publish your Blog Posts to Facebook and Twitter
Alright now there are many good free plugins out there to auto publish your blog posts to facebook or twitter, but the best one I found is a plugin called SNAP (Social Network Auto Poster) by NextScripts.
Now using this plugin you will need to create a facebook app which I have explained step by step with screenshots but first let me show you an easy way – that is using WordPress Jetpack Plugin.
Method 1: Using Jetpack Publicize plugin
This is probably the simplest but the disadvantage with this method is that you cannot customize your post much. Here is how you can do it
Step 1 – Activate Publicize Module
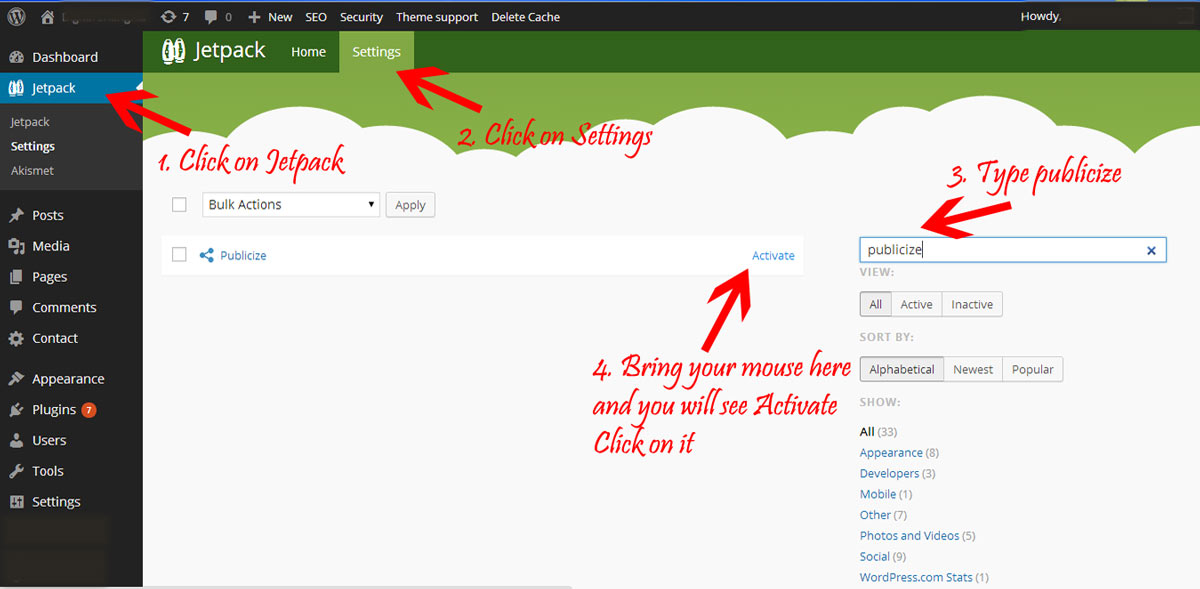
Click on Jetpack, go to settings and search for “Publicize” (don’t type the quotes). Hover your mouse on Publicize Module and click on Activate. I am assuming that you have already activated wordpress Jetpack.
Publicize Module in Jetpack [Screenshot]
Step 2 – Connect to Facebook
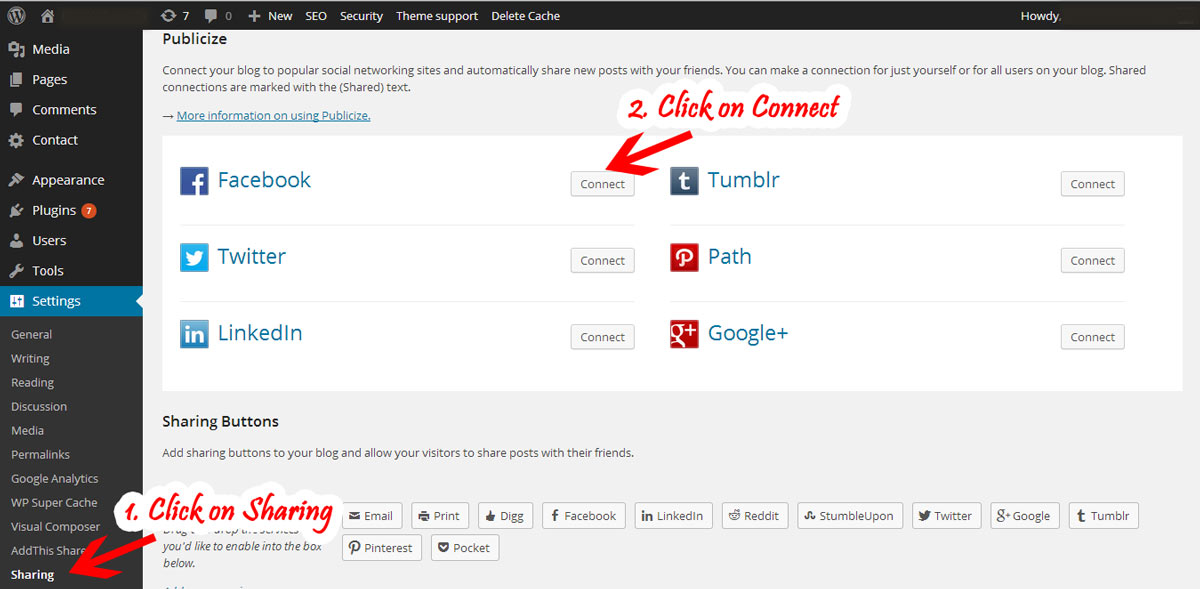
After activating, go to Settings and click on Sharing. Click on Connect near the facebook Logo. It will take a few seconds to connect to your facebook and then will show your facebook profile and the list of facebook pages (if you have any). Choose where you want to auto publish your blog posts and Click on OK.
Connect Publicize Module to Facebook [Screenshot] – Your Screen may differ depending on which version of WordPress you have installed
That’s it. For twitter, click on twitter icon and follow the prompt.
Method 2: SNAP (Social Network Auto Poster)
SNAP is a free plugin from NextScripts with highly customizable settings. You can choose the title of your post or post image or you customized message to be posted. The settings interface may look a bit intimidating at the beginning but once you understand it, you will love it because of its customization options.
There is also a pro version of this plugin which allows you to auto post on LinkedIn Company Pages, Google Plus and auto pin to your Pinterest board. With the free version you can auto post to Facebook, Twitter, Linked In (personal pages), Delicious, Blogger, Tumblr, wordpress compatible blogs and many more.
For detailed comparison click here. For most, like myself the free version is good enough. I use the Publicize module in Jetpack plugin (read the first method above) along with SNAP to post on Google Plus.
OK now follow these steps
Step 1 – Download, Install and activate the SNAP Plugin –
Plugin Page => https://wordpress.org/plugins/social-networks-auto-poster-facebook-twitter-g/
If you are a novice, here is a video on how to install
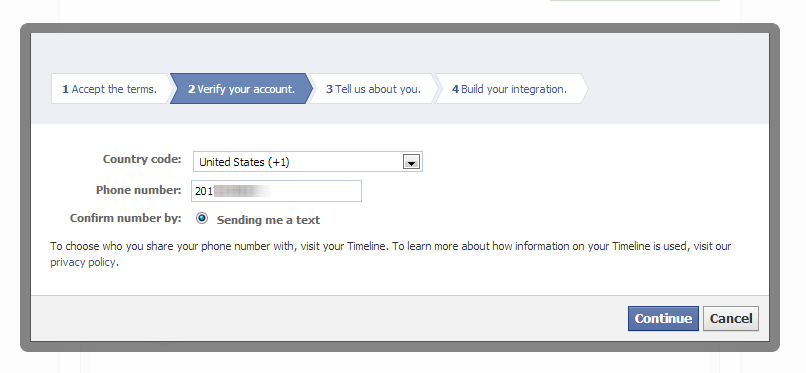
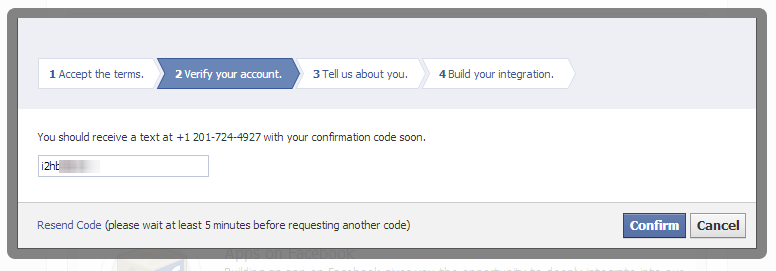
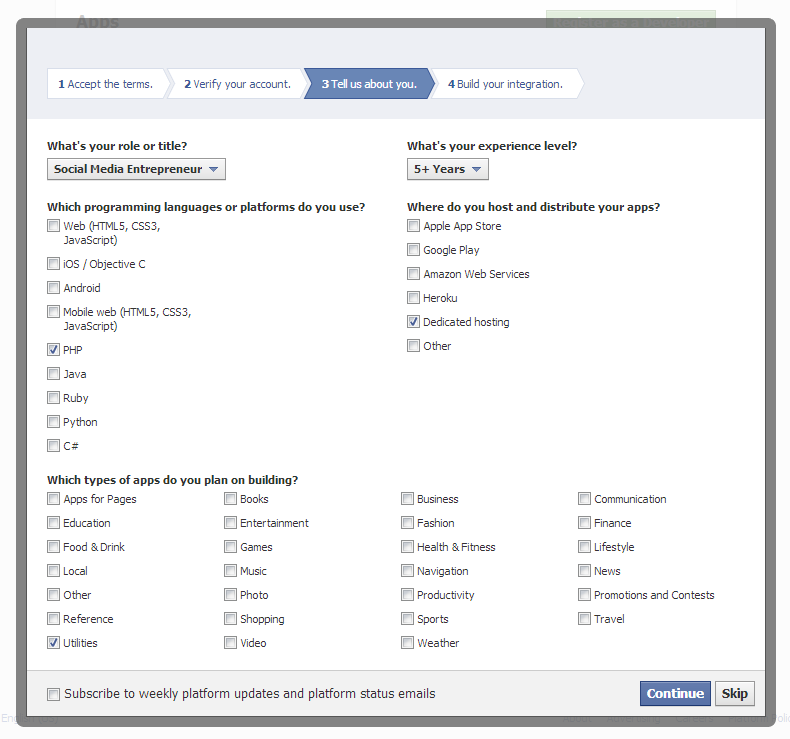
Step 2: Create a Facebook App
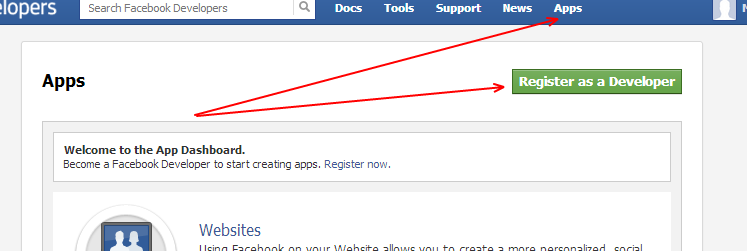
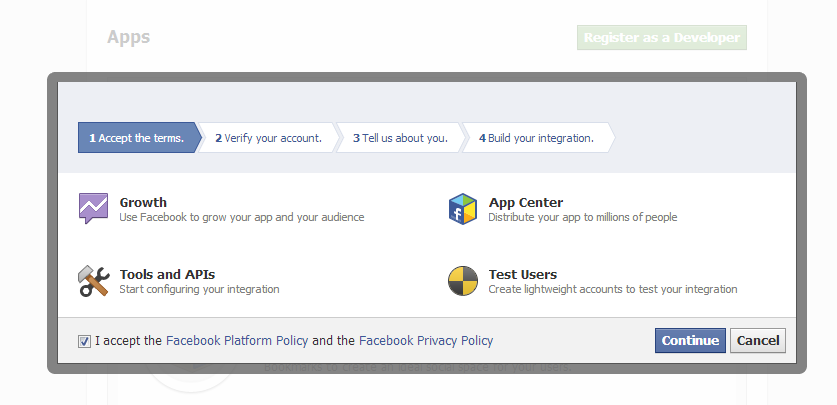
To auto post to Facebook account or pages, you need to create a Facebook App. Don’t scream! its easy. Just follow along. But you still think you don’t want to go through this then you can skip the the next method I have discussed – that is using the WordPress Jetpack plugin.
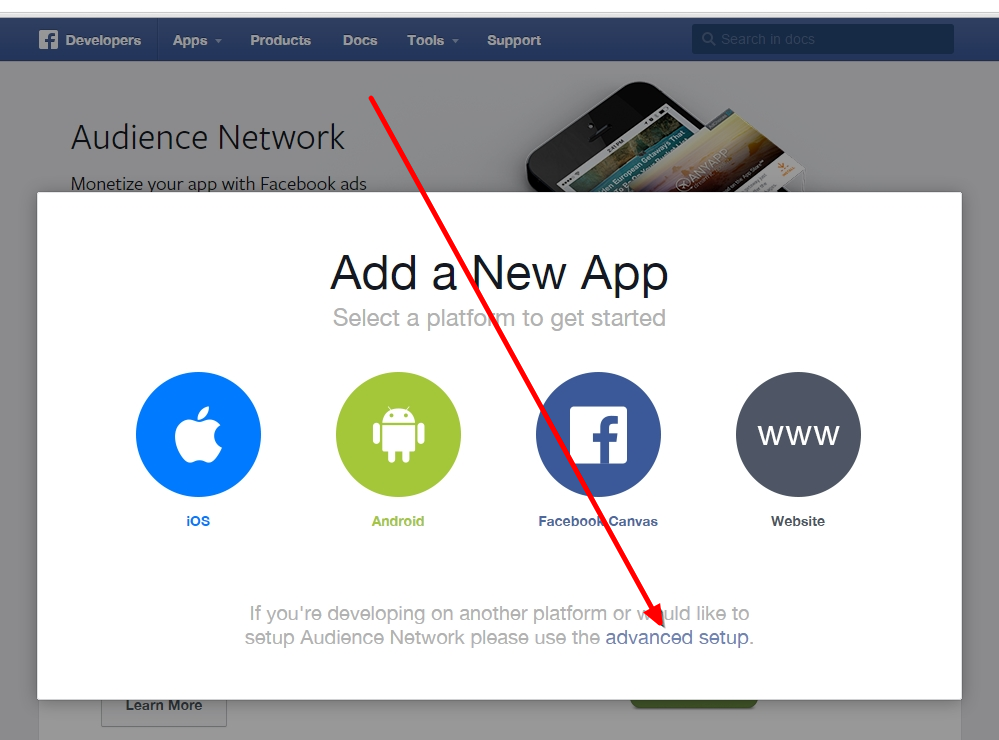
5. Click on Advanced Settings
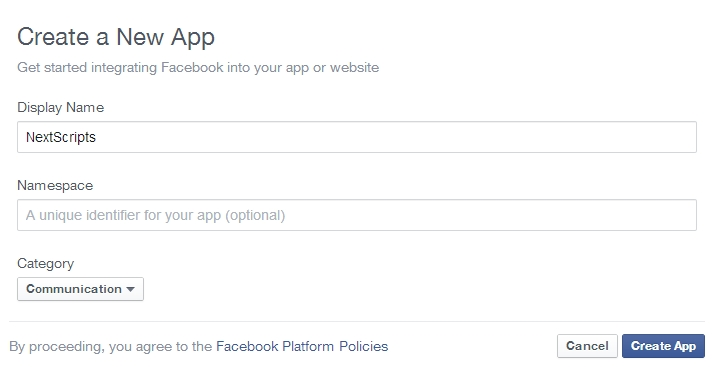
6. Fill “Display Name”, you can write any name but probably you will like to write your blog name here. Leave “App Namespace” empty, select any category. agree to policies and click “Create App”, fill captcha, click “Submit”.
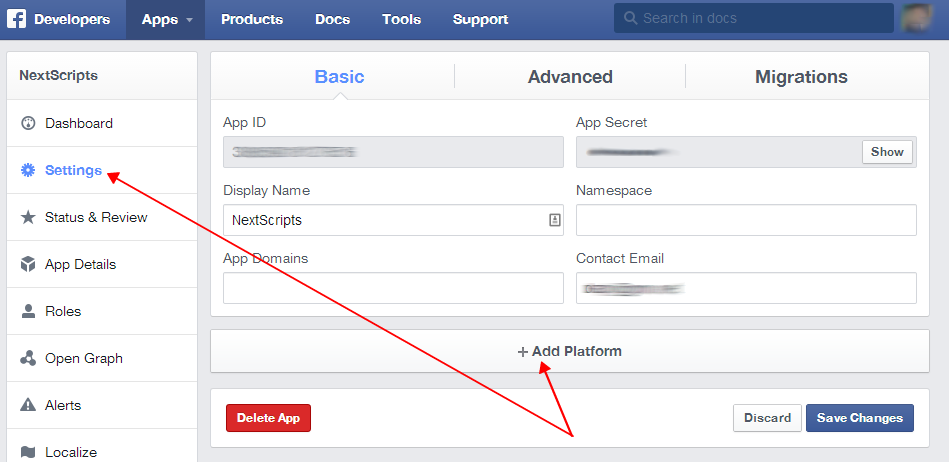
7. Now Click “Settings” on the left, fill “Contact email” field, then click “Add Platform”.
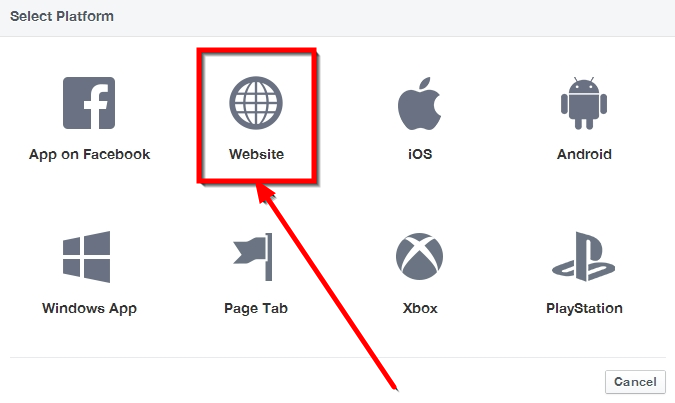
8. Select “Website” in the list.
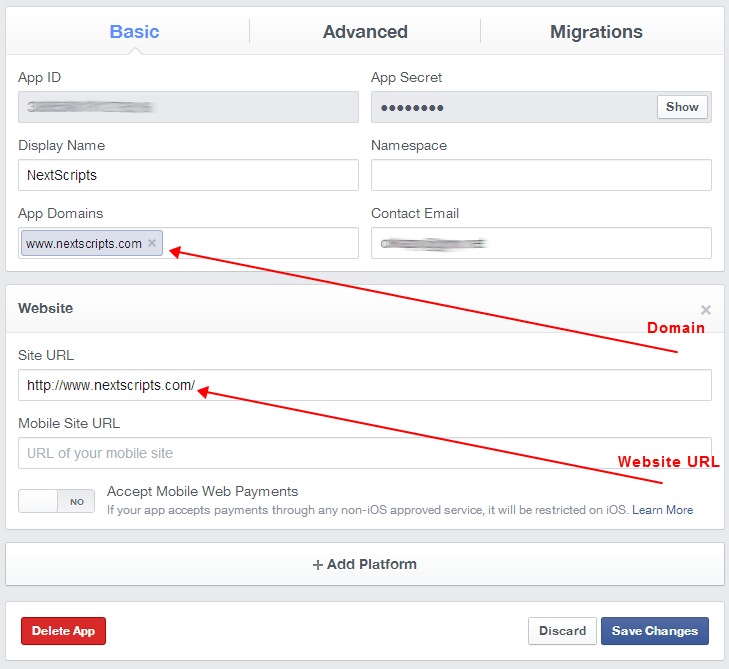
9. Enter your website URL to the “Site URL” field. Enter your domain to the App Domains. Domain should be the same domain from URL that you have entered to the “Site URL”.
Important!: You must enter the URL and domain that you see in your WordPress Admin Panel. For example your visitors come to your blog at https://blog.nextscripts.com, but you manage your blog from https://www.nextscripts.com/blog/wp-admin/ – you must enter https://www.nextscripts.com/blog to the URL Field and www.nextscripts.com as the domain. Also please note that nextscripts.com and www.nextscripts.com are two different domains.
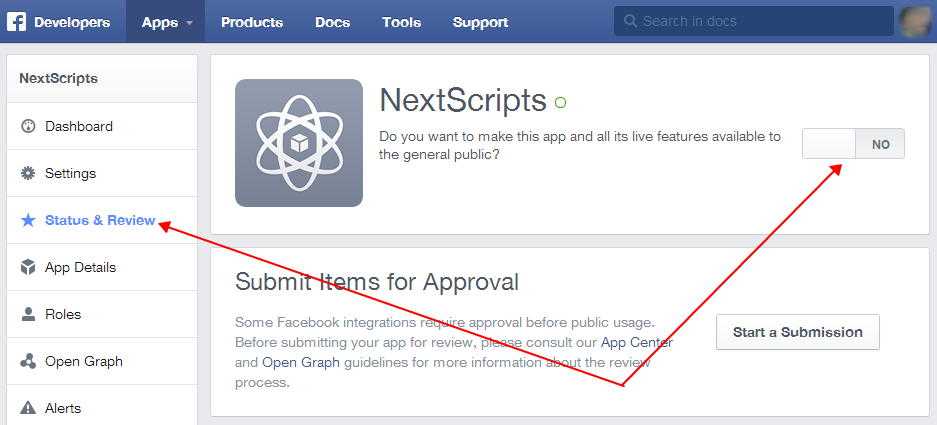
10. All Facebook apps are “Sandboxed” by default. All posts will be visible only to to Admins, Developers and Testers. You need to take an app “Live” if/when you would like your posts to be seen by everybody.
Click “Status & Review” on the lest. Change “Do you want to make this app and all its live features available to the general public?” switch from “No” to “Yes”.
Note: You don’t need to submit your app for review and approval.
11. Now go to Dashboard and note the App ID and App Secret
Step 3: Go to SNAP Settings
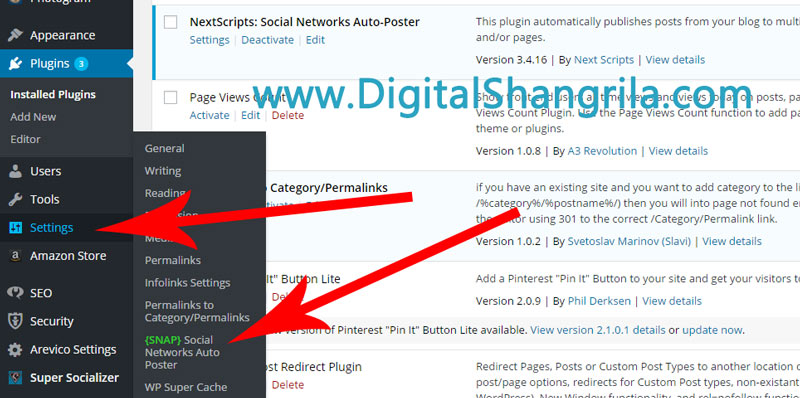
The hardest part is over. Next go back to your wordpress site backend and go to SNAP settings. Its located under WordPress Settings, see the screenshot below:
Click to Enlarge
Step 4: Add Facebook Account
Next you have to add your facebook and twitter accounts where you want your blogposts to be automatically posted.
- Click green “Add new account” button, select “Facebook” from the list.
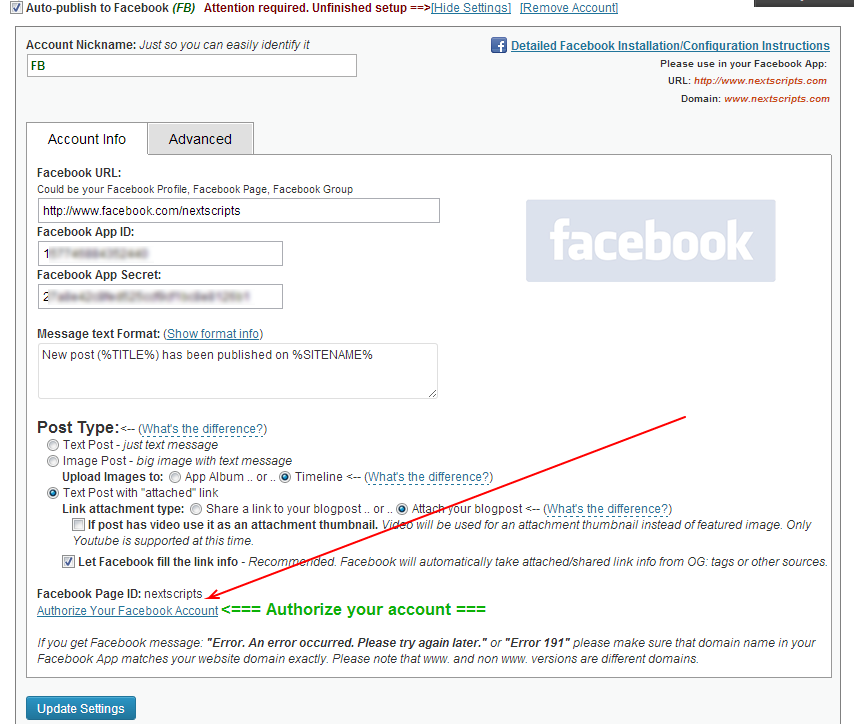
- Fill “Your Facebook URL” with your Community page or your personal Facebook URL or your Facebook Group URL or your Facebook Business Page URL.
- Fill “App ID” and “App Secret” from step 3 above.
- Authorize Facebook for your WordPress.
- Click “Update Settings”. Notice new link “Authorize Your Facebook Account”.
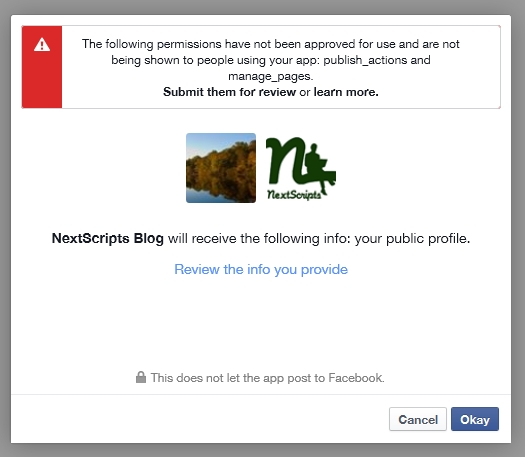
6. Click “Authorize Your Facebook Account” and follow the authorization wizard. Facebook will ask you series of questions. If you get any errors at this step, please make sure that domain for your WordPress site is entered to your App as “App Domain”.
Important: If Facebook tell you that you need to switch to your main account, you will need to close the wizard, go to facebook.com, switch account, and then start authorization from the beginning. If you are using it for facebook page or group, You must be logged to the facebook account that is the admin of the page or group.
Go on Clicking Okay button on the next screens.
Note (Again): Please don’t pay attention to the red message on top of the screenshot above, you don’t need to submit your app for review if you will be posting to the profile and pages you admin.
Your facebook account is now ready to use. 🙂
If you face any difficult setting it up feel free to leave a comment and I will try to reply. If you are using any other plugin that is equally good or better, please share it.






Nice blog here! Also your website loads up fast! What web host are you using?
Helpful info. Lucky me I found your website unintentionally. I bookmarked it.
Thank you for sharing this one.